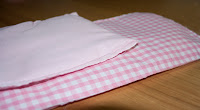
This was very easy to make considering this is only my second sewing project. I did make an alteration and that was to add some padding! Overall I am very pleased with it however there are some things I will bear in mind for next time such as being more careful attaching the bias tape and I found that even though I cut the gingham straight it stretched out of place slightly when I attached the interfacing making it impossible to get straight lines on the finished product.
 I ironed on the interfacing prior to cutting the fabric into the square.
I pinned and cut the fabric using the downloaded template to get nice rounded corners.
I then also cut the wadding into the same shape just slightly smaller
The front, wadding and the back where then all stitched together using a long straight stitch (a basting stitch).
And volia! What I done next which I forgot to photgraph was I the used the pink bias tape I had and stitched it to the top edge of the pocket, then around all of the raw edges as well as sewing a line straight down the middle to create pockets.

This is the finished product when open.
And this is when closed and tied :)
I had some left over fabric so created a pin cushion by sewing 3 sides together, turning inside out and filling with spare wadding and using a bit of bias tape for the bow :)


No comments:
Post a Comment