Showing posts with label Beginner. Show all posts

Thursday, 7 June 2012

Summer Essentials Sew Along (SESA) 2012


1 MONTH: In the month of June, sew one fabulous garment that you plan on strutting all summer.

1 GARMENT: Your choice!

1 GREAT LIST: http://www.flickr.com/groups/sssa/

1 FABULOUS PRIZE: 2.5 YARDS OF SUMMERY COOL SEERSUCKER & you could also win an indie sewing pattern of your choice from Ali!

For more details, to join in and to grab the badge please head over to the gorgeous girlies that are hosting the sew along: Sarah of Rhinestones & Telephones, Ali of The Wardrobe Reimagined and Alessa of Farbenfreude.


I am definitely taking part in this. I have been debating all day about what to make.


I have decided to go with Simplicity 2446. I know it doesn't look very summery but year after year I look for light summer blazers and never find any. I have a few modifications in mind to make it more summery (colour, material, 3/4 length gathered arms, different collar) so in theory it will be lovely, light and summery.


I have some black (I know I know stupid colour but I cant help it) cotton sheeting for the muslin as this will be my first jacket attempted so I am anticipating many muslins so I went for the cheapest material to hack into Winking smile. I am off now to find my pattern and work out what size to trace. Happy days. xx

Sunday, 3 June 2012

So little to do but even less time? How’d that one work out!

Well I seem to have so little time to blog, tweet and facebook at the moment yet I don’t seem to be getting a whole load of stuff done if that makes sense! Although I have been making the most of the weather whilst its been sunny but the good old UK as usual has given into rain this weekend.

I had some left over material from my Simplicity 2883 dress that was purchased at Lili Fabric's & thought well the sun is due and apart from my Colette Meringue I actually have no skirts but I also have no skirt patterns so I thought it cant be that hard to make a skirt with no pattern can it??….. Did I mention I’m really not keen on working with this material!

Anyway….I sat there with the lump of material I had and started to pleat it hand basting as well as pinning it as I went. I then remembered the material is lovely and stretchy but once sewn and be tricky to manoeuvre (but this is probably but my lack of experience talking). I decided rather than winding myself up and spending hours researching the net to just bang in a zip and button on the already pre planned elastic waistband (big smiles when I thought of this as I am yet to make any type of waistband lol).

Here is what I ended up with.
IMG_0633a    IMG_0634a    IMG_0627a
The pleats came out all the same size. I was happy with the elastic waist & I even put in an invisible zip and button.

I wore it for my mums birthday visit but it made me feel a bit old and frumpy (still trying to find “my” style):
IMG_0600

So I decided despite being constantly told wear waist clinchers, hide your hips, cover your upper arms and so on and so forth…… to do this (please excuse the blurred photo I really need to get a wireless remote all this running backwards and forward on self timer is not doing it for me or my pictures lol)!
IMG_0609

From the side empire line clothes tend to have the “is she pregnant or just a bit overweight” effect on me but straight on I find them quite flattering and I think this style of dress (if it was a dress lol)  is “in” at the moment. I can change up the top using different colours and styles and pair with belts worn under the bust (sounds silly I know but I’ve done it twice and it looked surprisingly good)!

I have already worn this out a few time and got a couple of compliments so I am more than pleased.


Friday, 9 March 2012

Sew Colette: Pastille Finished Finally.

Ok So I have now finally finished my Pastille Dress and it is well and truly wearable (just need to wait for some warmer weather)

I am off to do the school run now but I will post a pic to twitter and Flicker later of me wearing the dress once I set my camera up and find where I put my tripod.

So here is the final dress. Due to the disasters I had I have had to make a few alterations.
1. I added an extra pleat to the bottom of the skirt for personal preference.
2. I had to cover the neckline with a peter pan collar and I used Suzannah's tutorial to do this.
3. I removed the cap sleeves and converted them to basic short sleeves.


Now onwards to the truffle dress :) x

Sunday, 12 February 2012

Meringue

Well I decided to make a muslin for this project as being only my second clothing item. I was really good today and copied my pattern, cut the fabric but I have to be up super early to take my daughter to the cinema so I will have to put it all together tomorrow :( I am hoping there will not be too many adjustments to be made!

All done nice and neatly.

Ready to go when I get back from the cinema.

Monday, 6 February 2012

My First Finished Dress :)

Ok so it has taken me a while but I have been working on a practice run for my dress using the pattern from Simplicity 2406 and I must say it has been a challenge, with lots of unstitching and re-stitching. I am finding the patterns a little hard to follow and I know that I have jumped in the deep end considering this is only the third item I have ever sewn But here it is.

Please excuse my daughters wonderful wall drawing in the background. :)

This does look so much nicer on as my dress form is very old and has a deformed butt as you can see in the picture below!!
                                                      This is the back note you can see the dodgy buttock :)                                                                                            
                                                                                                                                                                       

I even managed the in seam pockets too :)

Sunday, 22 January 2012

Pattern Tracing

Pattern tracing such a lovely job! I decided to go with the Simplicity 2406 for my purple bi-stretch.

This has taken me ages. Here are some of the pieces for my dress I have done today. With the kitten trying to climb up my pattern :( and my daughter wanting to colour it in it was a hard task!


I will admit on my first top I done a 5 minute tracing job (really didn't get the importance of an accurate pattern). It was awful and led to an ill fitting top which required a lot of adjusting so this attempt I took my time and done it properly. I did cut corners and used baking parchment as I have no dressmaking paper left.

I have heard of some people fusing their patterns to interfacing but as I've got and intend to buy multi-size, I am going to try and keep the originals as they are so I can make different sizes if needed. 

I will pin to my practice fabric tomorrow and hope it goes well :) xxx

Help...Pattern decisions.

So I have spent the day doing a few long overdue alterations, have thrown together a bunch of drawstring bags for my sewing supplies (However I still need to buy some cord) and made a few hairbands for my little one.

But my dilemma is this...I have a really lovely purple bi-stretch cotton that I brought from Ashley Brook fabrics in Romford but I have no idea what dress to make!

I am still trying to work out my "style". What I like and what suits me seem to be two different things :( I am toying with simplicity 2406 (style c with the arms), Butterick 5305 (style b) or a really nice pattern in this months Burda Style which is a body con type dress with diagonal cut pieces. Either way this time I am going to do a mock dress in old cloth or a muslin before hand!

I best get tracing (a job I am not bonding with). How do you do yours?

Friday, 20 January 2012

Scissor case and pin cushion mini project.


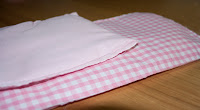
Well last night I decided to have a little play on my machine. I had some left over bias tape with some pink and gingham fabric so I decided to make up a free McCall pattern I downloaded from McCall's (all you have to do is enter your email address).


This was very easy to make considering this is only my second sewing project. I did make an alteration and that was to add some padding! Overall I am very pleased with it however there are some things I will bear in mind for next time such as being more careful attaching the bias tape and I found that even though I cut the gingham straight it stretched out of place slightly when I attached the interfacing making it impossible to get straight lines on the finished product.

 I ironed on the interfacing prior to cutting the fabric into the square.


I pinned and cut the fabric using the downloaded template to get nice rounded corners.


I then also cut the wadding into the same shape just slightly smaller


The front, wadding and the back where then all stitched together using a long straight stitch (a basting stitch).


And volia! What I done next which I forgot to photgraph was I the used the pink bias tape I had and stitched it to the top edge of the pocket, then around all of the raw edges as well as sewing a line straight down the middle to create pockets.


This is the finished product when open.


And this is when closed and tied :)


I had some left over fabric so created a pin cushion by sewing 3 sides together, turning inside out and filling with spare wadding and using a bit of bias tape for the bow :)


Fabric Sale :)

I popped into my local fabric shop today (Lili's Fabrics in Laurie Walk, Romford) and they have a sale on. I was quite taken with this fabric:


Reduced from £8.95 to £2.95 per yard how could I resist. Now I just have to work out what to make with it. I was thinking wide leg trousers or perhaps a dress of some sort. All ideas gratefully received. x


Tuesday, 17 January 2012

She finally Gets Going :)

Ok so I used a pattern from a magazine (Prima) and traced it onto paper very roughly and just used a black
marker (not ideal as I found out) but this was just a trial run!

Pinned and cut I was all pleased with myself. Even transfered all the darts, notches and cutlines onto the fabric using my tailors chalk. I was starting to feel like a proper professional.


Then came the time to begin pinning the garment into shape and start sewing! Right side, wrong side, graining.... did I check all that...urm cant say I did!

Well I am off to get sewing and hopefully will have the completed project to show you soon!